(Handstand) Advice To CrossFit Athletes From a Gymnastics Coach, Physical Therapist, and Former Gymnast -Pt 2

If you missed Part 1 of this series on basics and progressions, check it out here. The handstand is a straight up fundamental of gymnastics. The majority of gymnastics skills have some degree of a handstand basic built into it. If you’re a CrossFit athlete who wants to master complex handstand skills, and be super efficient with them in workouts, you need to be able to crush the basic handstand drills as you were walking upright on your feet. From a Physical Therapist/Gymnastics Coach point of view, you need to have the prerequisite movement components and basic handstand progressions set in stone before you progress to the complex movements.
If you don’t have them, you’ll likely be creating movement compensations that haunt you for years to come. Those same movement compensations that hinder performance also put excessive stress on certain areas of the body that may lead to pain (insert wrist, shoulder, neck, and lower back during handstands). Here are 5 of the biggest movement issues I see in CrossFit Athletes related to handstands, with some expanded info and videos to help troubleshoot them.

1. Missing Weight Bearing Wrist Extension
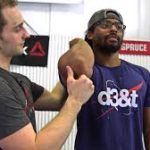
Just as your ankles need to be mobile enough to deep squat, pistol, and catch cleans, your wrists need to have enough mobility to line up a perfectly stacked handstand. Even more wrist extension is needed transition weight over them during handstand walking or handstand push ups. If your wrists are not mobile enough in a weight bearing position to transfer your center of mass over the hand, it will significantly impact the overall alignment and efficiency of any handstand skill.

![]()
![]()
If you spend all day at your job typing or on a computer, combined with lots of gripping/barbell/hanging work in CrossFit that jacks up your forearms, it’s very easy to loose your wrist extension. Just like many other parts of movement, wrist mobility and wrist stability is something you need to always stay on top of for ideal handstand work. Along with this, there is a big difference between how much your wrists can passively versus actively extend. Making sure you have full active wrist extension is very important, so that you are not just using your body weight to jam your wrist joint into an extended position. Here’s a video showing how I screen wrist extension, some mobility work to fix it, a control drill I often use, and a way to integrate the new wrist motion into a handstand drill. In order the video shows screening weight bearing wrist extension, light soft tissue work, wrist extension self mobilizations, an active wrist extension drill I got from Dr. Andreo Spina’s FRC system, some slow bear crawling, planche rocks, and wall walk ups.
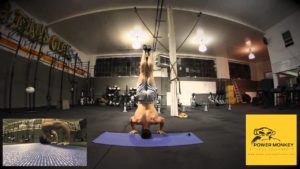
2. Missing Weight Bearing Dynamic Stability of Upper Body
This a huge one, and directly links to Part 1 on fundamentals. CrossFit athlete’s have to remember that our upper body chains are not inherently designed to be weight bearing like our legs have evolved to be. Our upper spine, shoulder blades, shoulders, elbows, wrists, and hands don’t have nearly the amount of mileage our legs have had supporting our body weight. Yes, we did crawl as babies and people argue maybe we are designed to be quadriped, but it is still a huge gap in force to what your body takes during inverted handstand work. Over years and years of gymnastics training gymnasts load and adapt their upper body structures repetitively to tolerate more weight bearing. Artistic gymnastics is also set up in a way that levels progress and allow increases in handstand complexity to be trained. I have heard quite a few complaints from CrossFit athlete’s about pinchy wrists, cranky elbows, and sore shoulders due to jumping over steps like I talked about last week. A slow handstand progression is partially to help assist in motor learning for proper basics/technique, but also to progressively adapt the upper body tissues to safely tolerate more load bearing capacity.
If you are a CrossFit athlete who dives into lots of handstand skill volume without appropriately fostering the same adaptation over time, it’s likely going to cause create pain. Would you walk into the gym as a Olympic lifting newbie, toss 3/4 your body weight on the barbell, and rep out push presses with terrible form? Probably not. Well, I consider it pretty much the same situation for handstand pushups. It baffles me when I see people new to gymnastics skills repping out terrible looking handstand push ups only to complain of pain and not know why. Being a very amateur Oly Lifter myself, if I load too much weight on my clean and hurt my back because my basics aren’t good enough, I haven’t trained enough progressively, or I haven’t listening to my coach, it’s my fault. Master basics, show fundamentals at all times, then load appropriately with handstand drill work to adapt the system.
Here are 3 handstand drills you can find more about through the Power Monkey crew, and then a longer video that my buddy Dr. Dan Pope of Fitness Pain Free and I put together jam packed full of handstand drills. I highly recommend people check out all the Power Monkey content and attend their awesome camp this fall to get more drills and progressions for handstands.
As I mentioned last week, if you are looking for more information on all things handstand movement screening, correction, and drills, be sure to check out the 150+ page / 5+ hours of video resource my good friend Dr. Dan Pope and I put together. It breaks down and walks through exactly how to set yourself up for perfect handstand skills.


There was a lot to that, so I’ll leave it at tips 1 and 2 for this week. Try those out and then soon I’ll be back with numbers 3-5 in relation to handstands. Have a great week!
– Dave Tilley DPT, SCS